×

iFour Logo

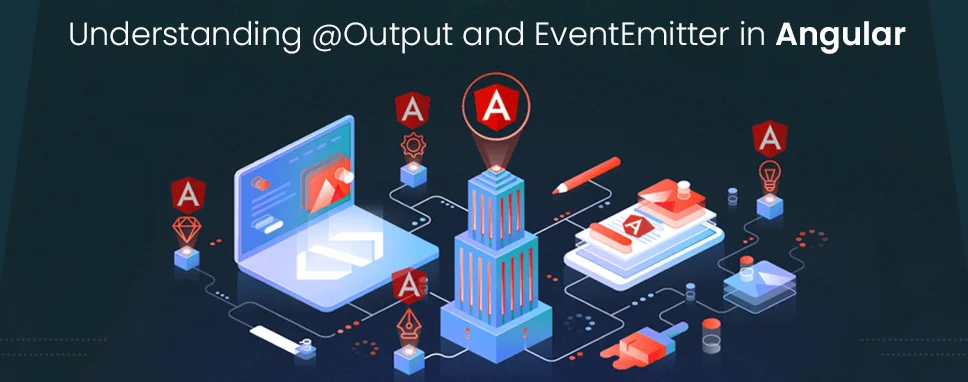
Understanding @Output and EventEmitter in Angular

Kapil Panchal - November 25, 2020

Listening is fun too.

Straighten your back and cherish with coffee - PLAY !
  • play
  • pause
  • pause
Understanding @Output and EventEmitter in Angular

Angular is a trusted choice for most experts and clients for Angular application development. This preference is fuelled by its outstanding feature repertoire, simple coding syntax, and inherent agility that ensures swift results. Harnessing the power of such platforms has become critical for interactive and dynamic user interfaces, as well as matching the rhythms of commercial competitors.

In this article, we'll unravel the intricacies of Angular's @Output decorator and its close companion, the EventEmitter class. These integral elements of Angular empower developers to establish seamless communication between components, facilitating the exchange of data and actions. Whether you're a skilled Angular developer or a newcomer curious about Angular's potential, this guide will equip you with a comprehensive understanding of these concepts.

Throughout this blog, we'll dive into the core principles of “Angular output event emitter” mechanisms. We'll not only decipher how to emit events effectively but also showcase real “Angular event emitter examples” that illustrate their implementation in practical scenarios. By the end, you'll not only comprehend the technicalities behind these concepts but also gain the confidence to apply them in your projects.

So, if you've ever wondered how to efficiently exchange information and trigger actions between different parts of your Angular application, you're in the right place. Let's delve into the world of Angular emit events, where you'll uncover the tools that enable dynamic interactions and enhance the user experience.

What is eventemitter in Angular?

Assume you're at a party and want to notify everyone that it's time for cake. You might clap your hands or yell. An EventEmitter works similarly in Angular. It allows different elements of your program to communicate with one another. One portion sends out a signal, while the other listens for it.

An EventEmitter is like a messenger. Let's say you have a "Like" button and a "Notification" area. When someone likes something, the "Like" button can send a message through the EventEmitter. The "Notification" area is listening for such messages and displays a notification when it hears one. It's like making sure everyone at the party knows what's happening. Just like that, an EventEmitter helps different pieces of your Angular app work together smoothly.

Now that you understand “what is emit in Angular”, let's look at what is @output.

What is @Output?

In Angular, @Output is a decorator used to create a custom event binding. It allows a child component to emit events to its parent component, enabling communication between the two. This helps in building interactive and dynamic applications by enabling the exchange of data and actions.

When an @Output decorator is applied to a property in a child component, it signifies that the property can emit events. These events can be captured and handled by the parent component using event binding. Essentially, @Output allows child components to send data or notifications to their parent components, triggering specific actions or updates.

With @Output, developers can create responsive and flexible Angular applications where different components can interact seamlessly, sharing information and reacting to user actions in real time. This mechanism enhances the modularity and reusability of components within the Angular framework.

As we all know that you can achieve two-way data binding with [(ngModel)], but what if we want to share data from one component to another component?

To accomplish that we can use @Input and @Output. Let's understand it with one example:

Here, we are using a parent component and a child component.


Here parent-component is serving as a context for the child-component. By using the @Input and @Output child component can communicate with the parent component.

@Input: This will allow the parent component to update or share data in the child component.

@Output: It allows child to share data with the parent component.

Let’s see how @Input works:

Working of @Input

Fig: Working of @Input

You will have to configure both parent-component and child-component to use @Input and @Output.

Child-Component

Step 1: We have to import input from angular/core

Step 2: Create a field in the export class which we will be going to use from the parent component and use @Input decorator.

child.component.ts:

 
	import {Component, Input} from '@angular/core'; // step 1
	export class FruitDetailComponent {
	@Input () fruit: string; // step 2
	}


As we can see @Input decorates the fruit property, here we have set the fruit type to string you can set it as per your requirements such as number, object, string, or Boolean. The value of the fruit will be derived from its parent component

Step 3: let's add it to the HTML page.

Child.component.html


this fruit name is: {{fruit}}


Now let's move to the parent component:

Step 1: We will have to bind that property in the parent component. Use the child component selector tag to bind that property. Use property binding"[ ]" to assign value to that variable.

Parent.component.html


Step 2: Assign real value for currentFruit from app.component.ts file in Export class. Parent.component.ts

	  export class AppComponent {
	  currentFruit = 'Apple';
	  }
	

So, here's what will happen: we have a value that we want to share with another component, thus angular will transfer 'currentFruit' from the parent component to its child. @Input is used on a component.

Here is the image which might help you to understand.

currentFruit

How @Output Works?


It's a kind of reverse process of @input,@Output is used to share data from the child component to the parent component.

Output


Fig: Working of @Output


@output is a kind of doorway to pass data from the child component to its parent component.

@Output property will raise an event from the child component to notify the change to the parent component. @Output must have an EventEmitter to raise an event. EventEmitter is a class of @angular/core.

Now let's see how to use @Output.

Similarly, like @Input, we will have to configure both, child and parent components.

For child.component:

Let's create an input property where the user can add value and a button that will raise an event on click.

Step 1: Import output and EventEmitter from angular/core in your ts file.

Step 2: Add a property with @Output decorator which has a type of EventEmitter.

Step 3:Create an add method in the same component ts file

So, your ts file will look like this:

Child.component.ts:

	  import { Component } from '@angular/core';
	  import { Output, EventEmitter } from '@angular/core'; //step 1
	  @Component({
		selector: 'app-child',
		templateUrl: './child.component.html',
		styleUrls: ['./child.component.scss']
	  })
	  export class ChildComponent {
		@Output() newFruitEvent = new EventEmitter();//step 2
		addNewFruit(value: string) {                //step 3
		  this.newFruitEvent.emit(value);
		}
	  }


Step 4: Add input file with template variable ‘#newFruit’ and add a button with Event 'addNewFruit' to the component HTML page

child.component.html


The button click event is bounded to its component’s ts file with addNewFruit() method.

Now let's move to the parent component side:

Step 1: Create an array and a method that can push data in that array.

Parent.component.ts:

	  export class AppComponent {
		fruits = ['Apple', 'Banana', 'Orange'];
		addFruits(newFruit: string) {
		  this.fruits.push(newFruit);
		}
	  }
	

Step 2: In the parent template, we will have to bind that parent method to its child event.


The event binding, (newFruitEvent)=”addFruit($event)” will connect the event to its child component’s newFruitEvent, to the method in the parent ts file ‘addFruits()’.

This '$event' will have data which is entered by the user in the child component's input field, if we want to see the output of this code we can add the following code in our parent component HTML page.

  • {{fruit}}

*ngFor will work like a loop and show all available fruit in fruits.

How to use @Input and @Output together?


We can use @Input and @Output for the same component with the following code:

Output

The child selector app-child with ‘fruit’ and ‘deleteRequest’ being @input and @Output properties in the child component and the property 'currentfruit' and 'crossOffFruit()' are in the parent component.

Looking to hire Angular developers for your business? Your search ends here.

Angular EventEmitter


As discussed above, EventEmitter is used with @Output directive to emit custom events asynchronously and synchronously and register handlers for those events by subscribing to an instance.

Let’s understand it with the following eventemitter angular example:

	import { Component } from '@angular/core';
import { Output, EventEmitter } from '@angular/core'; //step 1

@Component({
  selector : 'child',
  template : `
  `
})
class Child {
  @Output() notifyParent: EventEmitter = new EventEmitter();
  sendNotification() {
      this.notifyParent.emit('Some value to send to the parent');
  }
}
@Component({
  selector : 'parent',
  template : `
      
  `
})
class Parent {
  getNotification(evt) {
      // Do something with (evt),which is sent by the child!
  }
}


Here in this example, we have two-component and two classes with the name of Parent and child, and we are performing some method in the child and want to pass that data to its parent so in that case, we can utilize EventEmitter.

Conclusion


In this blog, we have gone through the concept of output event emitter in angular, and after learning their basics, we learned an angular eventemitter example to understand it with clarity.

Angular stands as a powerful tool and a preferred choice for interactive UI development. When you want to share data between two components, you will have to use @Input and @Output with EventEmitter. 

Remember, EventEmitter angular notifies data changes from the child component to a parent component. Check out the following example to understand it clearly.

Eventemitter
Understanding @Output and EventEmitter in Angular Table of Content 1. What is @Output? 2. Child-Component 3. How @Output Works? 4. Using @Input and @Output together 5. EventEmitter 6. Conclusion Angular is a trusted choice for most experts and clients for Angular application development. This preference is fuelled by its outstanding feature repertoire, simple coding syntax, and inherent agility that ensures swift results. Harnessing the power of such platforms has become critical for interactive and dynamic user interfaces, as well as matching the rhythms of commercial competitors. In this article, we'll unravel the intricacies of Angular's @Output decorator and its close companion, the EventEmitter class. These integral elements of Angular empower developers to establish seamless communication between components, facilitating the exchange of data and actions. Whether you're a skilled Angular developer or a newcomer curious about Angular's potential, this guide will equip you with a comprehensive understanding of these concepts. Throughout this blog, we'll dive into the core principles of “Angular output event emitter” mechanisms. We'll not only decipher how to emit events effectively but also showcase real “Angular event emitter examples” that illustrate their implementation in practical scenarios. By the end, you'll not only comprehend the technicalities behind these concepts but also gain the confidence to apply them in your projects. So, if you've ever wondered how to efficiently exchange information and trigger actions between different parts of your Angular application, you're in the right place. Let's delve into the world of Angular emit events, where you'll uncover the tools that enable dynamic interactions and enhance the user experience. What is eventemitter in Angular? Assume you're at a party and want to notify everyone that it's time for cake. You might clap your hands or yell. An EventEmitter works similarly in Angular. It allows different elements of your program to communicate with one another. One portion sends out a signal, while the other listens for it. An EventEmitter is like a messenger. Let's say you have a "Like" button and a "Notification" area. When someone likes something, the "Like" button can send a message through the EventEmitter. The "Notification" area is listening for such messages and displays a notification when it hears one. It's like making sure everyone at the party knows what's happening. Just like that, an EventEmitter helps different pieces of your Angular app work together smoothly. Now that you understand “what is emit in Angular”, let's look at what is @output. What is @Output? In Angular, @Output is a decorator used to create a custom event binding. It allows a child component to emit events to its parent component, enabling communication between the two. This helps in building interactive and dynamic applications by enabling the exchange of data and actions. When an @Output decorator is applied to a property in a child component, it signifies that the property can emit events. These events can be captured and handled by the parent component using event binding. Essentially, @Output allows child components to send data or notifications to their parent components, triggering specific actions or updates. With @Output, developers can create responsive and flexible Angular applications where different components can interact seamlessly, sharing information and reacting to user actions in real time. This mechanism enhances the modularity and reusability of components within the Angular framework. As we all know that you can achieve two-way data binding with [(ngModel)], but what if we want to share data from one component to another component? To accomplish that we can use @Input and @Output. Let's understand it with one example: Here, we are using a parent component and a child component. Here parent-component is serving as a context for the child-component. By using the @Input and @Output child component can communicate with the parent component. @Input: This will allow the parent component to update or share data in the child component. @Output: It allows child to share data with the parent component. Let’s see how @Input works: Fig: Working of @Input You will have to configure both parent-component and child-component to use @Input and @Output. Child-Component Step 1: We have to import input from angular/core Step 2: Create a field in the export class which we will be going to use from the parent component and use @Input decorator. child.component.ts:   import {Component, Input} from '@angular/core'; // step 1 export class FruitDetailComponent { @Input () fruit: string; // step 2 }   As we can see @Input decorates the fruit property, here we have set the fruit type to string you can set it as per your requirements such as number, object, string, or Boolean. The value of the fruit will be derived from its parent component Step 3: let's add it to the HTML page. Child.component.html   this fruit name is: {{fruit}}   Now let's move to the parent component: Step 1: We will have to bind that property in the parent component. Use the child component selector tag to bind that property. Use property binding"[ ]" to assign value to that variable. Parent.component.html   Step 2: Assign real value for currentFruit from app.component.ts file in Export class. Parent.component.ts export class AppComponent { currentFruit = 'Apple'; } Read More: Building An Angular App With Azure Web Apps Service So, here's what will happen: we have a value that we want to share with another component, thus angular will transfer 'currentFruit' from the parent component to its child. @Input is used on a component. Here is the image which might help you to understand. How @Output Works? It's a kind of reverse process of @input,@Output is used to share data from the child component to the parent component.   Fig: Working of @Output   @output is a kind of doorway to pass data from the child component to its parent component. @Output property will raise an event from the child component to notify the change to the parent component. @Output must have an EventEmitter to raise an event. EventEmitter is a class of @angular/core. Now let's see how to use @Output. Similarly, like @Input, we will have to configure both, child and parent components. For child.component: Let's create an input property where the user can add value and a button that will raise an event on click. Step 1: Import output and EventEmitter from angular/core in your ts file. Step 2: Add a property with @Output decorator which has a type of EventEmitter. Step 3:Create an add method in the same component ts file So, your ts file will look like this: Child.component.ts: import { Component } from '@angular/core'; import { Output, EventEmitter } from '@angular/core'; //step 1 @Component({ selector: 'app-child', templateUrl: './child.component.html', styleUrls: ['./child.component.scss'] }) export class ChildComponent { @Output() newFruitEvent = new EventEmitter();//step 2 addNewFruit(value: string) { //step 3 this.newFruitEvent.emit(value); } } Step 4: Add input file with template variable ‘#newFruit’ and add a button with Event 'addNewFruit' to the component HTML page child.component.html Add a fruit: Add to parent's fruit list The button click event is bounded to its component’s ts file with addNewFruit() method. Now let's move to the parent component side: Step 1: Create an array and a method that can push data in that array. Parent.component.ts: export class AppComponent { fruits = ['Apple', 'Banana', 'Orange']; addFruits(newFruit: string) { this.fruits.push(newFruit); } } Step 2: In the parent template, we will have to bind that parent method to its child event.   The event binding, (newFruitEvent)=”addFruit($event)” will connect the event to its child component’s newFruitEvent, to the method in the parent ts file ‘addFruits()’. This '$event' will have data which is entered by the user in the child component's input field, if we want to see the output of this code we can add the following code in our parent component HTML page. {{fruit}} *ngFor will work like a loop and show all available fruit in fruits. How to use @Input and @Output together? We can use @Input and @Output for the same component with the following code: The child selector app-child with ‘fruit’ and ‘deleteRequest’ being @input and @Output properties in the child component and the property 'currentfruit' and 'crossOffFruit()' are in the parent component. Looking to hire Angular developers for your business? Your search ends here. Contact us now Angular EventEmitter As discussed above, EventEmitter is used with @Output directive to emit custom events asynchronously and synchronously and register handlers for those events by subscribing to an instance. Let’s understand it with the following eventemitter angular example: import { Component } from '@angular/core'; import { Output, EventEmitter } from '@angular/core'; //step 1 @Component({ selector : 'child', template : `Notify my parent! ` }) class Child { @Output() notifyParent: EventEmitter = new EventEmitter(); sendNotification() { this.notifyParent.emit('Some value to send to the parent'); } } @Component({ selector : 'parent', template : ` ` }) class Parent { getNotification(evt) { // Do something with (evt),which is sent by the child! } }   Here in this example, we have two-component and two classes with the name of Parent and child, and we are performing some method in the child and want to pass that data to its parent so in that case, we can utilize EventEmitter. Conclusion In this blog, we have gone through the concept of output event emitter in angular, and after learning their basics, we learned an angular eventemitter example to understand it with clarity. Angular stands as a powerful tool and a preferred choice for interactive UI development. When you want to share data between two components, you will have to use @Input and @Output with EventEmitter.  Remember, EventEmitter angular notifies data changes from the child component to a parent component. Check out the following example to understand it clearly.

Build Your Agile Team

Enter your e-mail address Please enter valid e-mail

Categories

Ensure your sustainable growth with our team

Talk to our experts
Sustainable
Sustainable
 

Blog Our insights

Power Apps vs Power Automate: When to Use What?

I often see people asking questions like “Is Power App the same as Power Automate?”. “Are they interchangeable or have their own purpose?”. We first need to clear up this confusion...

Azure DevOps Pipeline Deployment for Competitive Business: The Winning Formula

We always hear about how important it is to be competitive and stand out in the market. But as an entrepreneur, how would you truly set your business apart? Is there any way to do...

React 18 Vs React 19: Key Differences To Know For 2024

Ever wondered how a simple technology can spark a revolution in the IT business? Just look at React.js - a leading Front-end JS library released in 2013, has made it possible. Praised for its seamless features, React.js has altered the way of bespoke app development with its latest versions released periodically. React.js is known for building interactive user interfaces and has been evolving rapidly to meet the demands of modern web development. Thus, businesses lean to hire dedicated React.js developers for their projects. React.js 19 is the latest version released and people are loving its amazing features impelling them for its adoption.