×

iFour Logo

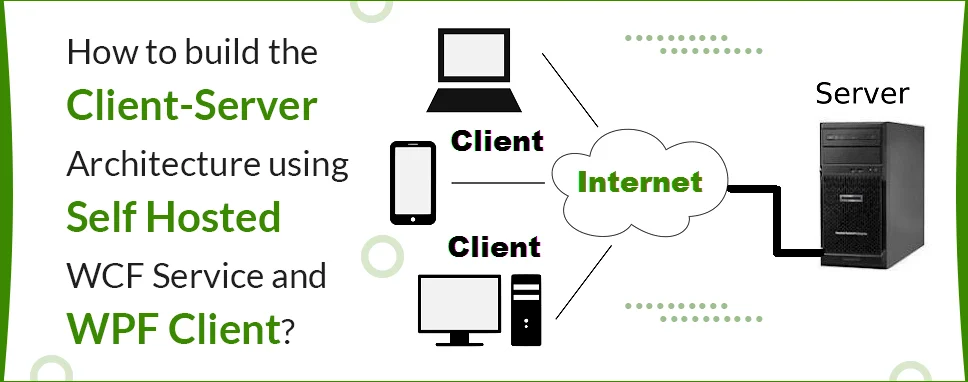
How to build the Client-Server Architecture using Self Hosted WCF Service and WPF Client?

Kapil Panchal - November 18, 2020

Listening is fun too.

Straighten your back and cherish with coffee - PLAY !
  • play
  • pause
  • pause
How to build the Client-Server Architecture using Self Hosted WCF Service and WPF Client?

What is a self-hosted WCF service?


Self-hosting is the simplest way to host your services and a Self-hosted is that it hosts the service in an application that could be a Console Application or Window Forms, etc.

WCF-service

Ways to host the WCF service.

  1. Hosting in Internet Information Services (IIS).
  2. Hosting in Console or Desktop Application (Self-hosting).

WCF service has two types of zones.

  1. Services
  2. Clients

Services

Some steps to create live services.

  1. Define a service contract
  2. Implement a service contract
  3. Host and run a service contract

Clients

There are three steps to communicate between WCF Client and service.

  1. Create a WCF Clien
  2. Configure a WCF Client.
  3. Use a WCF Client.

Now, let’s see the steps to create a project.


Step: 1

Open visual studio, and create new project. After project creation, open solution explorer and right-click on the project name and click Add -> New Item -> and select WCF Service Library, this will be creating two files here CompanyClass and ICompanyClass are those two files.


Step: 2

Now, we can add a Service contract and Data contract. Service contract for Operation contract and Data contract for data members.

Here is a Company class model.

 
using System;
usingSystem.Collections.Generic;
usingSystem.Linq;
usingSystem.Runtime.Serialization;
usingSystem.Text;
usingSystem.Threading.Tasks;
namespaceWCFExample
{
  [DataContract]
publicclassCompanyClass
  {
    [DataMember]
publicstring CompanyName { get; set; }
    [DataMember]
publicstring Address { get; set; }
    [DataMember]
publicintCompanyYear{ get; set; }
publicCompanyClass()
    {
    }
  }
}
        

Now, add the Service contract and Operation contract.

 
using System;
usingSystem.Collections.Generic;
usingSystem.Linq;
usingSystem.ServiceModel;
usingSystem.Text;
usingSystem.Threading.Tasks;
namespaceWCFExample
{
  [ServiceContract]
publicinterfaceICompanyService
  {
    [OperationContract]
IListcompanyClasses();
    [OperationContract]
voidUpdate(CompanyClass cc);
  }
}


Step: 3

Now, we have to implement a service in our class.

 
using System;
usingSystem.Collections.Generic;
usingSystem.Linq;
usingSystem.Text;
usingSystem.Threading.Tasks;
namespaceWCFExample
{
publicclassAddServices :ICompanyService
  {
static ListcompanyClasses = new List()
      {
    newCompanyClass() {CompanyName="Ifour", Address="Thaltej", CompanyYear=30},
    newCompanyClass() {CompanyName="TCS", Address="AgoraMall", CompanyYear=20},
    newCompanyClass() {CompanyName="Tencent", Address="S.G.Highway", CompanyYear=10},
    newCompanyClass() {CompanyName="TensorFlow", Address="Sola", CompanyYear=15},
    newCompanyClass() {CompanyName="Stridly", Address="Shivranjani", CompanyYear=14},
      };
publicvoidUpdate(CompanyClass cc)
{
    var data = companyClasses.FirstOrDefault(s =>s.CompanyName == cc.CompanyName);
    if (data!=null)
    {
      data.Address = cc.Address;
      data.CompanyYear = cc.CompanyYear;
    }
}
publicIListClasses()
  {
      returncompanyClasses;
  }
}
}


usingSystem.ServiceModel;
usingSystem.ServiceModel.Description;
publicstaticvoid Main(string[] args)
  {
using (ServiceHost host = newServiceHost(typeof(AddServices)))
      {
    ServiceMetadataBehaviorserviceMetadata  =newServiceMetadataBehavior { HttpGetEnabled = true };
    host.Description.Behaviors.Add(serviceMetadata);
    host.AddServiceEndpoint(typeof(AddServices), newNetTcpBinding { Security = { Mode = SecurityMode.None } }, nameof(AddServices));
    host.Open();
    Console.WriteLine("Services are hosted successfully.");
    Console.WriteLine("Press any key to stop the services.");
    Console.ReadKey();
      }
  }
         
Step: 4

All Services are ready to host. Now, run your project and check your services are hosted successfully and you can get one service URL.

Now, we can create a WPF project for creating a client and consuming their services.


Step: 5

Create a new project for WPF Windows Application and use services using the MVVM pattern.

First of all, we have to create a proxy channel for the WCF Company service. Using this proxy object, we can get the service data that we want.

Let’s see how to create a proxy and get the data from the server.

 
using System;
usingSystem.Collections.Generic;
usingSystem.Linq;
usingSystem.ServiceModel;
usingSystem.Text;
usingSystem.Threading.Tasks;
namespaceWCFExample
{
publicclassProxyServicewhereT :class
{
  private T _GetT;
  public T GetT(string path)
  {
    return _GetT ?? (_GetT = ServiceInstance(path));
  }
  privatestatic T ServiceInstance(string path)
  {
    varbindpath = newNetTcpBinding();
    bindpath.Security.Mode = SecurityMode.None;
    EndpointAddressendpointAddress = newEndpointAddress(path);
    returnChannelFactory.CreateChannel(bindpath, endpointAddress);
  }
}
}

        
Step: 6

After setting the proxy channel, create a folder and give it the name view model for the Company models and binding it with the Xaml.

 
using System;
usingSystem.Collections.Generic;
usingSystem.Collections.ObjectModel;
usingSystem.Linq;
usingSystem.Text;
usingSystem.Threading.Tasks;
usingSystem.Windows.Input;
namespaceWCFExample.ViewModel
{
publicclassCompanyViewModel
{
  privatereadonlyICompanyServicecompanyService;
  publicCompanyViewModel()
  {
    ListData = newObservableCollection();
    varProxyservices = newProxyService();
    companyService = Proxyservices.GetT("net.tcp://localhost:9950/CompanyService");
    var companies = companyService.companyClasses();
    foreach (var company in companies)
    {
      ListData.Add(newCompaniesViewModel(company, this));
    }
  }
  publicObservableCollectionListData{ get; set; }
  publicvoidUpdateProperty(CompaniesViewModelcompaniesViewModel)
  {
    companyService.Update(companiesViewModel.Model);
  }
}
publicclassCommands :ICommand
{
  private Action action;
  privateFuncfunc;
  publiceventEventHandlerCanExecuteChanged
  {
    add
    {
      CommandManager.RequerySuggested += value;
    }
    remove
    {
      CommandManager.RequerySuggested -= value;
    }
  }
  publicCommands(Action action, Funcfunc = null)
  {
    this.action = action;
    this.func = func;
  } 
  publicboolCanExecute(objectparam)
  {
    returnthis.func == null || this.func(param);
  }
  publicvoidExecute(object param)
  {
    this.action(param);
  }
}
}


Wants to Talk with Our Highly Skilled WPF Developer ? Contact Now.


Step: 7

Now, add one more view model for representing every detail of the Company. In this view model we implicit INotifyPropertyChanged for an instant update.

 
usingJetBrains.Annotations;
using System;
usingSystem.Collections.Generic;
usingSystem.ComponentModel;
usingSystem.Linq;
usingSystem.Runtime.CompilerServices;
usingSystem.Text;
usingSystem.Threading.Tasks;
namespaceWCFExample.ViewModel
{
publicclassCompaniesViewModel :INotifyPropertyChanged
  {
  public Commands EventHandler{ get; privateset; }
  privatereadonlyCompanyViewModel _base;
  privatestring address;
  privateint year;
  publicCompanyClass Model;
  publicstring Address
      {
    get{ return address; }
    set
          {
      if(address != value)
      {
        address = value;
        Model.Address = value;
        _base.UpdateProperty(this);
        OnPropertyChanged(nameof(Address));
              }
          }
      }
  publicint Year
  {
    get{ return year; }
    set
    {
      if(year != value)
      {
        year = value;
        Model.CompanyYear = value;
        _base.UpdateProperty(this);
        OnPropertyChanged(nameof(Year1));
        OnPropertyChanged(nameof(Year2));
        OnPropertyChanged(nameof(Year3));
        OnPropertyChanged(nameof(Year4));
        OnPropertyChanged(nameof(Year5));
          }
        }
      }
      publicbool Year1 =>Model.CompanyYear>= 30;
      publicbool Year2 =>Model.CompanyYear>= 20;
      publicbool Year3 =>Model.CompanyYear>= 10;
      publicbool Year4 =>Model.CompanyYear>= 15;
      publicbool Year5 =>Model.CompanyYear>= 14;
  publicCompaniesViewModel(CompanyClass company, CompanyViewModel companies)
      {
          Model = company;
    EventHandler = new Commands(OnClickYear);
          _base = companies;
          address = company.Address;
          year = company.CompanyYear;
      }
  privatevoidOnClickYear(objectobj)
      {
    this.Year = int.Parse(obj.ToString());
      }
    publiceventPropertyChangedEventHandlerPropertyChanged;
      [NotifyPropertyChangedInvocator]
    protectedvirtualvoidOnPropertyChanged([CallerMemberName] stringpropertyName = null)
      {
    PropertyChanged?.Invoke(this, newPropertyChangedEventArgs(propertyName));
      }
  }
}
        

Conclusion


Self-hosting in WCF is easy to use you can make your service running using a few lines of code, you can control your service through the Open () and Close () methods of ServiceHost. Window Communication Foundation is a reliable, secure, and scalable messaging platform for the .NET framework, and have some other features like Security, Data Contract, Service Oriented, Transaction, etc.

How to build the Client-Server Architecture using Self Hosted WCF Service and WPF Client? What is a self-hosted WCF service? Self-hosting is the simplest way to host your services and a Self-hosted is that it hosts the service in an application that could be a Console Application or Window Forms, etc. Ways to host the WCF service. Hosting in Internet Information Services (IIS). Hosting in Console or Desktop Application (Self-hosting). WCF service has two types of zones. Services Clients Services Some steps to create live services. Define a service contract Implement a service contract Host and run a service contract Clients There are three steps to communicate between WCF Client and service. Create a WCF Clien Configure a WCF Client. Use a WCF Client. Now, let’s see the steps to create a project. Step: 1 Open visual studio, and create new project. After project creation, open solution explorer and right-click on the project name and click Add -> New Item -> and select WCF Service Library, this will be creating two files here CompanyClass and ICompanyClass are those two files. Step: 2 Now, we can add a Service contract and Data contract. Service contract for Operation contract and Data contract for data members. Here is a Company class model.   using System; usingSystem.Collections.Generic; usingSystem.Linq; usingSystem.Runtime.Serialization; usingSystem.Text; usingSystem.Threading.Tasks; namespaceWCFExample { [DataContract] publicclassCompanyClass { [DataMember] publicstring CompanyName { get; set; } [DataMember] publicstring Address { get; set; } [DataMember] publicintCompanyYear{ get; set; } publicCompanyClass() { } } } Now, add the Service contract and Operation contract.   using System; usingSystem.Collections.Generic; usingSystem.Linq; usingSystem.ServiceModel; usingSystem.Text; usingSystem.Threading.Tasks; namespaceWCFExample { [ServiceContract] publicinterfaceICompanyService { [OperationContract] IListcompanyClasses(); [OperationContract] voidUpdate(CompanyClass cc); } } Read More: What Are The Different Ways Of Binding In Wpf? Step: 3 Now, we have to implement a service in our class.   using System; usingSystem.Collections.Generic; usingSystem.Linq; usingSystem.Text; usingSystem.Threading.Tasks; namespaceWCFExample { publicclassAddServices :ICompanyService { static ListcompanyClasses = new List() { newCompanyClass() {CompanyName="Ifour", Address="Thaltej", CompanyYear=30}, newCompanyClass() {CompanyName="TCS", Address="AgoraMall", CompanyYear=20}, newCompanyClass() {CompanyName="Tencent", Address="S.G.Highway", CompanyYear=10}, newCompanyClass() {CompanyName="TensorFlow", Address="Sola", CompanyYear=15}, newCompanyClass() {CompanyName="Stridly", Address="Shivranjani", CompanyYear=14}, }; publicvoidUpdate(CompanyClass cc) { var data = companyClasses.FirstOrDefault(s =>s.CompanyName == cc.CompanyName); if (data!=null) { data.Address = cc.Address; data.CompanyYear = cc.CompanyYear; } } publicIListClasses() { returncompanyClasses; } } }   usingSystem.ServiceModel; usingSystem.ServiceModel.Description; publicstaticvoid Main(string[] args) { using (ServiceHost host = newServiceHost(typeof(AddServices))) { ServiceMetadataBehaviorserviceMetadata =newServiceMetadataBehavior { HttpGetEnabled = true }; host.Description.Behaviors.Add(serviceMetadata); host.AddServiceEndpoint(typeof(AddServices), newNetTcpBinding { Security = { Mode = SecurityMode.None } }, nameof(AddServices)); host.Open(); Console.WriteLine("Services are hosted successfully."); Console.WriteLine("Press any key to stop the services."); Console.ReadKey(); } } Step: 4 All Services are ready to host. Now, run your project and check your services are hosted successfully and you can get one service URL. Now, we can create a WPF project for creating a client and consuming their services. Step: 5 Create a new project for WPF Windows Application and use services using the MVVM pattern. First of all, we have to create a proxy channel for the WCF Company service. Using this proxy object, we can get the service data that we want. Let’s see how to create a proxy and get the data from the server.   using System; usingSystem.Collections.Generic; usingSystem.Linq; usingSystem.ServiceModel; usingSystem.Text; usingSystem.Threading.Tasks; namespaceWCFExample { publicclassProxyServicewhereT :class { private T _GetT; public T GetT(string path) { return _GetT ?? (_GetT = ServiceInstance(path)); } privatestatic T ServiceInstance(string path) { varbindpath = newNetTcpBinding(); bindpath.Security.Mode = SecurityMode.None; EndpointAddressendpointAddress = newEndpointAddress(path); returnChannelFactory.CreateChannel(bindpath, endpointAddress); } } } Step: 6 After setting the proxy channel, create a folder and give it the name view model for the Company models and binding it with the Xaml.   using System; usingSystem.Collections.Generic; usingSystem.Collections.ObjectModel; usingSystem.Linq; usingSystem.Text; usingSystem.Threading.Tasks; usingSystem.Windows.Input; namespaceWCFExample.ViewModel { publicclassCompanyViewModel { privatereadonlyICompanyServicecompanyService; publicCompanyViewModel() { ListData = newObservableCollection(); varProxyservices = newProxyService(); companyService = Proxyservices.GetT("net.tcp://localhost:9950/CompanyService"); var companies = companyService.companyClasses(); foreach (var company in companies) { ListData.Add(newCompaniesViewModel(company, this)); } } publicObservableCollectionListData{ get; set; } publicvoidUpdateProperty(CompaniesViewModelcompaniesViewModel) { companyService.Update(companiesViewModel.Model); } } publicclassCommands :ICommand { private Action action; privateFuncfunc; publiceventEventHandlerCanExecuteChanged { add { CommandManager.RequerySuggested += value; } remove { CommandManager.RequerySuggested -= value; } } publicCommands(Action action, Funcfunc = null) { this.action = action; this.func = func; } publicboolCanExecute(objectparam) { returnthis.func == null || this.func(param); } publicvoidExecute(object param) { this.action(param); } } } Wants to Talk with Our Highly Skilled WPF Developer ? Contact Now. See here Step: 7 Now, add one more view model for representing every detail of the Company. In this view model we implicit INotifyPropertyChanged for an instant update.   usingJetBrains.Annotations; using System; usingSystem.Collections.Generic; usingSystem.ComponentModel; usingSystem.Linq; usingSystem.Runtime.CompilerServices; usingSystem.Text; usingSystem.Threading.Tasks; namespaceWCFExample.ViewModel { publicclassCompaniesViewModel :INotifyPropertyChanged { public Commands EventHandler{ get; privateset; } privatereadonlyCompanyViewModel _base; privatestring address; privateint year; publicCompanyClass Model; publicstring Address { get{ return address; } set { if(address != value) { address = value; Model.Address = value; _base.UpdateProperty(this); OnPropertyChanged(nameof(Address)); } } } publicint Year { get{ return year; } set { if(year != value) { year = value; Model.CompanyYear = value; _base.UpdateProperty(this); OnPropertyChanged(nameof(Year1)); OnPropertyChanged(nameof(Year2)); OnPropertyChanged(nameof(Year3)); OnPropertyChanged(nameof(Year4)); OnPropertyChanged(nameof(Year5)); } } } publicbool Year1 =>Model.CompanyYear>= 30; publicbool Year2 =>Model.CompanyYear>= 20; publicbool Year3 =>Model.CompanyYear>= 10; publicbool Year4 =>Model.CompanyYear>= 15; publicbool Year5 =>Model.CompanyYear>= 14; publicCompaniesViewModel(CompanyClass company, CompanyViewModel companies) { Model = company; EventHandler = new Commands(OnClickYear); _base = companies; address = company.Address; year = company.CompanyYear; } privatevoidOnClickYear(objectobj) { this.Year = int.Parse(obj.ToString()); } publiceventPropertyChangedEventHandlerPropertyChanged; [NotifyPropertyChangedInvocator] protectedvirtualvoidOnPropertyChanged([CallerMemberName] stringpropertyName = null) { PropertyChanged?.Invoke(this, newPropertyChangedEventArgs(propertyName)); } } } Conclusion Self-hosting in WCF is easy to use you can make your service running using a few lines of code, you can control your service through the Open () and Close () methods of ServiceHost. Window Communication Foundation is a reliable, secure, and scalable messaging platform for the .NET framework, and have some other features like Security, Data Contract, Service Oriented, Transaction, etc.
Kapil Panchal

Kapil Panchal

A passionate Technical writer and an SEO freak working as a Technical Content Manager at iFour Technolab, USA. With extensive experience in IT, Services, and Product sectors, I relish writing about technology and love sharing exceptional insights on various platforms. I believe in constant learning and am passionate about being better every day.

Build Your Agile Team

Enter your e-mail address Please enter valid e-mail
Categories

Ensure your sustainable growth with our team

Talk to our experts
Sustainable
Sustainable
 

Blog Our insights

Quarkus vs Spring Boot - What’s Ideal for Modern App Development?

Spring Boot has long been a popular choice for developing custom Java applications. This is owing to its comprehensive features, impeccable security, and established ecosystem. Since...

Kotlin vs Java - Top 9 Differences CTOs Should Know

Choosing the right programming language becomes crucial as it greatly influences the success of a software development project. When it comes to selecting the best programming language...

Customizing KeyCloak using Required Actions: A Top Security Tip for Business

KeyCloak is an open-source identity and access management (IAM) solution for modern Java application development services. It enables developers to easily add authentication...